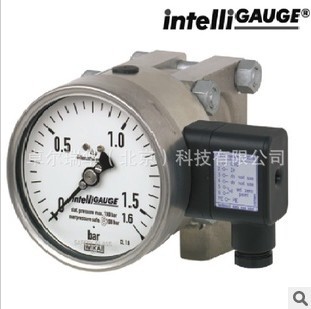
WIKA DPGT43HP 帶過(guò)壓保護(hù)全鋼電接點(diǎn)差壓壓力表 適用于所有介質(zhì)
Differential pressure gauge with electrical output signal
Universal version, high overpressure safety
Models DPGT43HP.100 and DPGT43HP.160
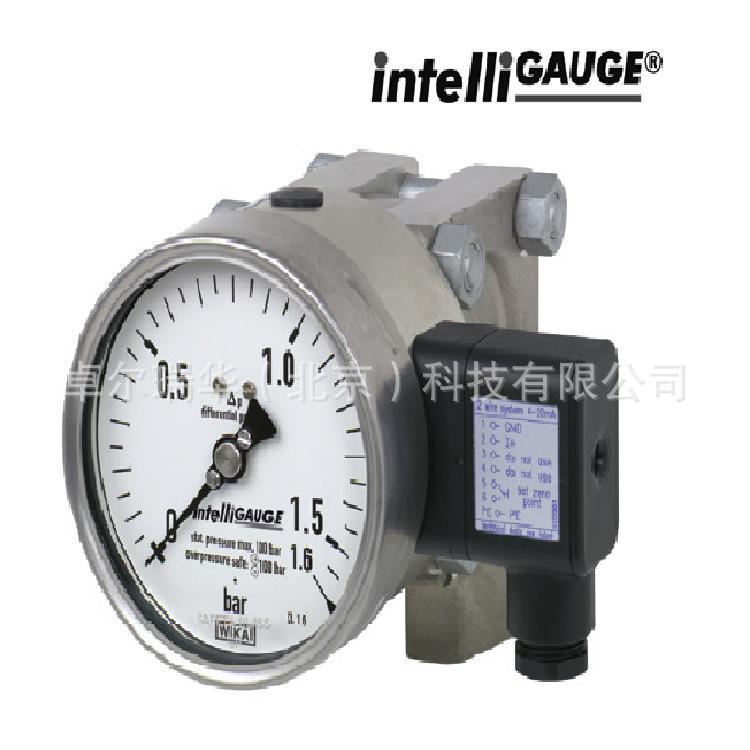
Differential pressure gauge model DPGT43HP.100
Applications
Acquisition and display of process values
Transmission of process values to the control room (4 ... 20 mA)
For measuring bs with a high differential pressure overload and/or high working pressures (static pressures), also in aggressive ambience
Easy-to-read, analogue on-site display needing no external power
Special features
High working pressure (static pressure) and high overpressure safety, optionally up to 40, 100, 250 or 400 bar
Individual, non-linear characteristic curves (e. g. x2 or √x for flow measurement)
"Plug and play" with no configuration necessary
Differential pressure measuring ranges from 0 … 60 mbar
Hydraulic cushioning protection against rapid pressure changes
Debion
At any point where a differential pressure has to be indicated locally, and, at the same time, a signal is wanted to be transmitted to a central controller or remote control room, the model DPGT43HP inbliGAUGE (patent applied for, among
others European Patent No. EP 06113003) can be used.
The electronic WIKA transmitter, integrated into the model 732.14 high-quality mechanical differential pressure gauge, combines the advantages of electrical signal transmission with the advantages of a local mechanical display.
Even if the power supply is compleby lost, the differential pressure can be read securely. The rugged design of the diaphragm measuring system produces a pointer rotation proportional to the pressure.
An electronic angle encoder, proven in safety-critical automotive
applications, determines the b of the pointer shaft - it is a non-contact sensor and therefore compleby free from wear and friction. From this, the electrical output signalproportional to the pressure, 4 ... 20 mA, is produced. The
electrical zero point can also be set manually.
These differential pressure gauges are made of highly corrosion-resistant stainless steel. A high overpressure safety is achieved by the all-bl construction and the close-fitting design of the diaphragm measuring element.
With its high-grade stainless steel construction and robust design this pressure gauge is geared to chemical and process engineering applications. It is suitable for gaseous or liquid media, also in aggressive ambience.
The wetted parts for these differential pressure gauges are available also in special materials such as Monel, Hasbloy or PTFE.
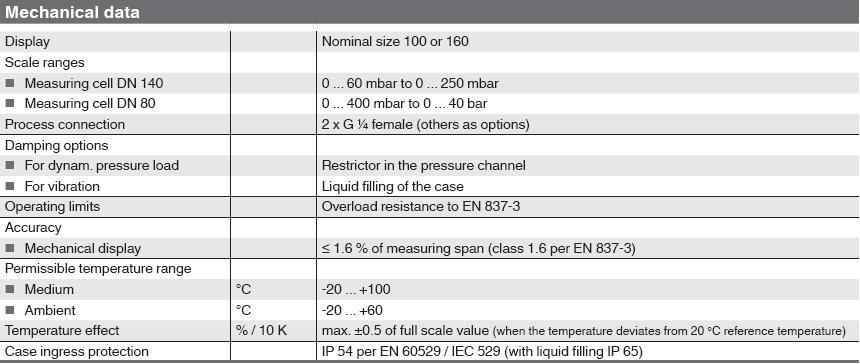
Standard version
Design
highest overpressure safety either side, pressure ratings
PN 40, 100, 250 oder 400,
Hydraulic cushioning protection against rapid pressure changes
Nominal size in mm
100, 160
Accuracy class
1.6
Scale ranges
0 ... 60 mbar to 0 ... 250 mbar (measuring cell DN 140)
0 ... 0.4 bar to 0 ... 40 bar (measuring cell DN 80)
With overpressure safety 400 bar: 0 ... 0.4 bar to 0 ... 40 bar or all other equivalent vacuum or combined pressure and vacuum ranges
Pressure limitation
Steady: Full scale value
Fluctuating: 0.9 x full scale value
Overpressure safety and max. working pressure (static pressure)
either side max. 40, 100, 250 or 400 bar
Pressure elements (wetted)
Stainless steel / NiCrCo-alloy (Duratherm)
Sealings (wetted)
FPM / FKM
Process connections (wetted)
Stainless steel 1.4571, lower mount (LM) 2 x G ¼ female
Venting of the media chambers (wetted)
Stainless steel 1.4571 for scale ranges ≤ 0.25 bar (option for scale ranges ≥ 0.4 bar!)
Measuring cell
Chrome steel
Movement
Brass
Dial
Aluminium, white, black lettering
Pointer
Adjustable pointer, aluminium, black (with the liquid filling option: Standard pointer, aluminium, black)
Zero adjustment
By means of adjustable pointer
Case / Bayonet ring
Stainless steel, ingress protection IP 54
Window
Laminated safety glass
Measuring cell filling
Silicone oil
Mounting
according to affixed symbols
⊕ high pressure, ? low pressure
Mounting by means of
Rigid measuring lines
Mounting holes in measuring flange
Panel mounting flange (option)
Mounting bracket for wall or pipe mounting (option)
Options
Liquid filling (silicone M50)
Venting of the media chambers for scale ranges ≥ 0.4 bar Measuring cell filling with special medium, e.g. for use
oxygen applications (static pressure max. 100 bar)
Measuring cell filling with special medium, e.g. for use in
oxygen applications (static pressure max. 100 bar)
Customer-specific characteristic curve (also non-linear)
Combined display of differential pressure and working pressure
Wetted parts made of special material
Panel mounting flange
Mounting bracket for wall or pipe mounting, lacquered steel or stainless steel
Monel version
Version per ATEX Ex II 2G Ex ia IIC T4 / T5 / T6
Gost standard approval
Pressure equalising valve (data sheet AC 09.11)
Switch contacts (data sheet AC 08.01)
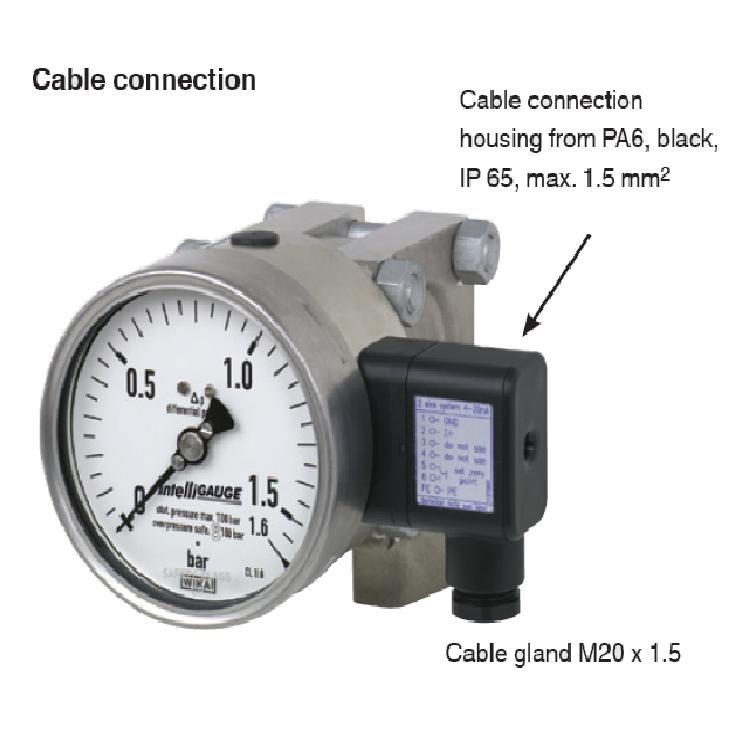
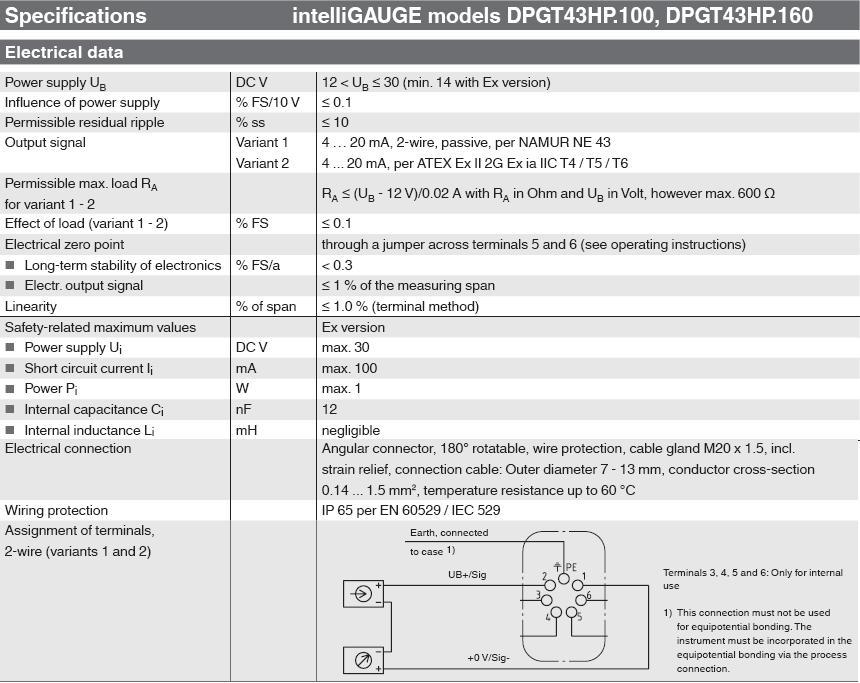
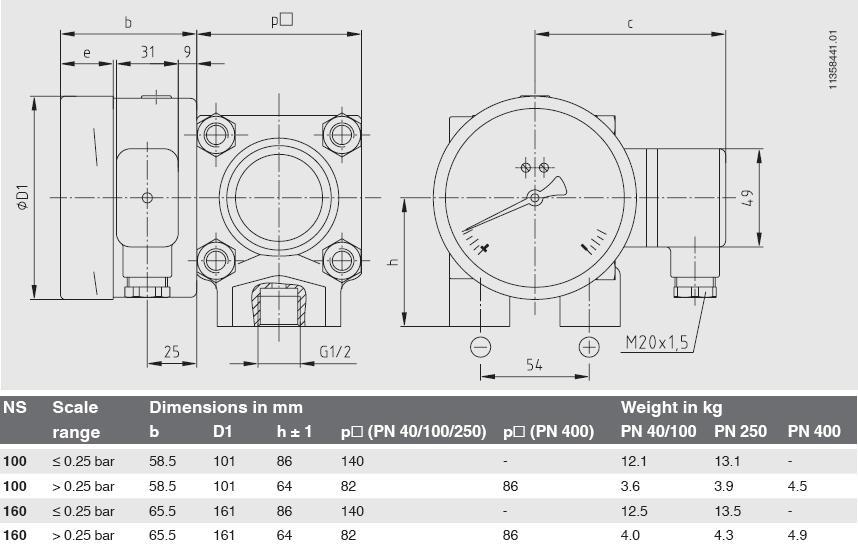
Dimensions in mm
Standard version
Ordering inbation
Model / Nominal size / Scale range / Connection size / Connection b / Output signal / Scale layout (linear pressure or
square root incrementation) / Max. working pressure (static pressure) / Options
CE conbity
EMC directive
2004/108/EC, EN 61326 emission (group 1, class B) and interference
immunity (industrial application)
ATEX directive
94/9/EC, II 2 G Ex ia IIC
歡迎致電咨詢訂購(gòu)WIKA DPGT43HP 帶過(guò)壓保護(hù)全鋼電接點(diǎn)差壓壓力表 適用于所有介質(zhì)
電話:010-51669912 56291930 15910733293
傳真:010-51669912
QQ:823377546 1491421115 2636968574
公司官網(wǎng):http://www.zoriver.cn http://www.zoriver.com.cn